It’s mid-winter and all my plants have died. At the end of fall I harvested my balcony garden and moved some of the containers inside. They fell one by one and now only the parsley bravely hangs on to life. Around here the farmers markets run from May to October, so the first one is still several months off.
I still wanted to incorporate fresh, local vegetables into my diet, so I googled plants you can grow indoors in the winter. A lot of the articles I found suggested using artificial lights on the plants, which I didn’t want to do. In my searching I found the idea of growing sprouts and microgreens.
There are a lot of great things about growing sprouts. They grow well at room temperature and don’t require much light. I only have to keep these plants alive for five days before harvesting them. And what can be more fresh or local than sprouts grown right on my own kitchen counter? I decided to try growing sprouts as a way to have fresh produce in the winter, but they can be grown all year round.
Sprouts can also be grown in a tray but I decided to go with the jar method. Here are the directions I used for growing sprouts: https://www.treehugger.com/green-food/grow-your-own-sprouts-jar.html
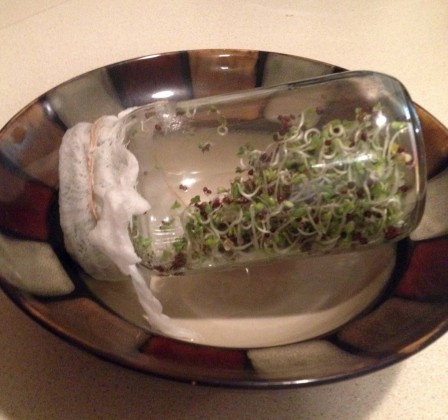
You can buy a special plastic-screened lid that screws onto a mason jar for sprouting if you want. I used a clean pasta jar with some cheesecloth tied onto the top with a string (I used a rubber band before but I find the rubber band breaks down after a while so string works better for this). This also is a great way to reuse any glass jars you have that you might have lost the lid to. Who needs to go to the store and buy a fancy mason jar and lid when you have a motely collection of jars you got for free? (well, as a bonus to the food in the jar that you bought)
In the bulk spice and tea section of the co-op grocery store I go to they have broccoli seeds for sprouting and I’ve had the best results with those. (The first time I tried growing sprouts I didn’t want to go out and buy anything special so I used the seeds from a squash I was cooking. The seeds took longer to sprout and some of the seeds turned kinda black and gross-looking.)
The directions suggest rinsing the sprouts 2-4 times a day. I do twice a day -in the morning and at night, which takes me about a minute altogether. Growing the sprouts is low-effort, just remembering to rinse them is the tricky part.
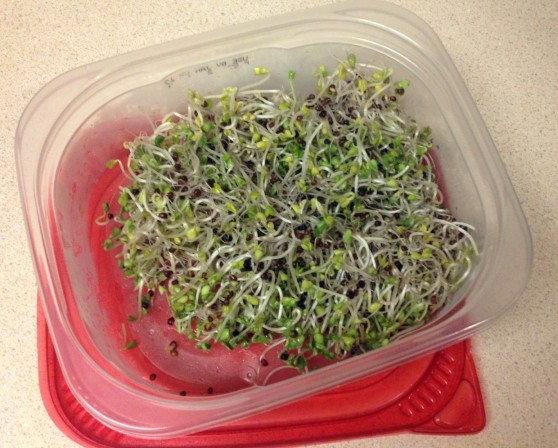
With the broccoli seeds I harvest them after 4 or 5 days. I store them in a container in the fridge. They have a nice crunchy texture and I like the sense of accomplishment from eating something I have grown. Buying the sprouting seeds and growing them yourself is also a lot cheaper than buying the packages of sprouts/microgreens from the store. Before I started growing my own sprouts I would rarely eat them because they are so expensive at the store. But now, as someone who eats (and grows their own) sprouts I feel like I have really upped my hippie game a level.
Things I have liked using my sprouts for:
- an ingredient in salads
- on a sandwich or wrap
- as a topping on soups and stir fries